Friday, 29 March 2013
Sunday, 24 March 2013
Inside NXT Brick. Replacing broken USB port.
A student of Lego Robotics class accidentally broke the USB port of NXT brick, thus I had to replace it.
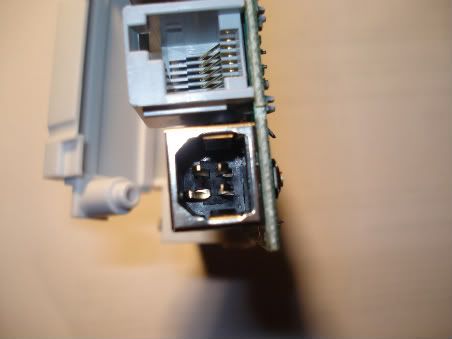
Removing the battery revealed four bolts that I had to remove in order to open the top of the brick. After removing the top, you'll see two more bolts, which hold the display and the whole brick together.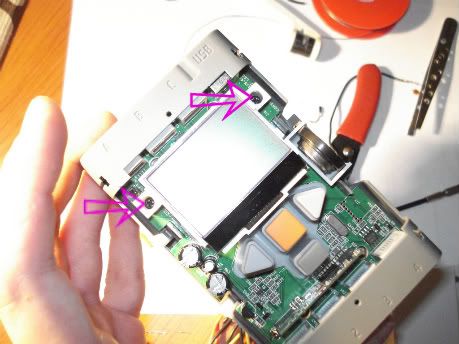
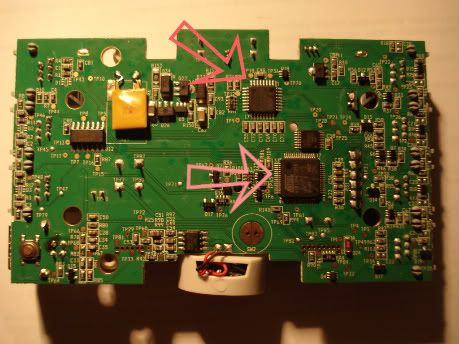
I thought that removing all the bolts will allow me to disassemble it completely but after a little picking I realized that the board was actually soldered to the battery holder. After unsoldering the two pins I was able to see the other side of the board. There were three main components that will catch your eye immediatelly :
I had no time to inspect all of the components, because I had to replace the broken port. Unsoldering the old port was exhausting.
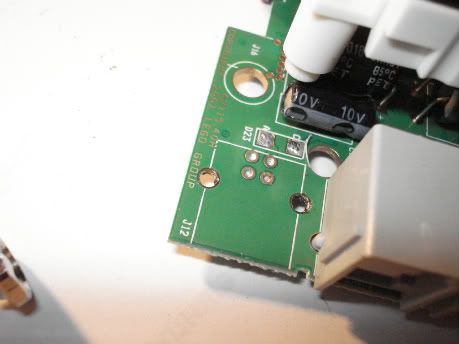
Placing the new one was easy and it cаme up pretty well.
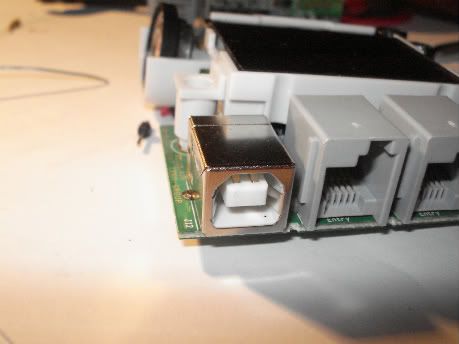
It was time to put everything together. I don't know why but resoldering the right pin of the battery took me ages. When you put it together do not forget to place the black rubber button between the board and battery holder - you need it if you have rechargable li-ion battery. Before screwing back the last four bolts check if you have connection with your PC.
For full information and schematics download this

Removing the battery revealed four bolts that I had to remove in order to open the top of the brick. After removing the top, you'll see two more bolts, which hold the display and the whole brick together.

I thought that removing all the bolts will allow me to disassemble it completely but after a little picking I realized that the board was actually soldered to the battery holder. After unsoldering the two pins I was able to see the other side of the board. There were three main components that will catch your eye immediatelly :
- the Bluetooth module at the top of the board next to the display
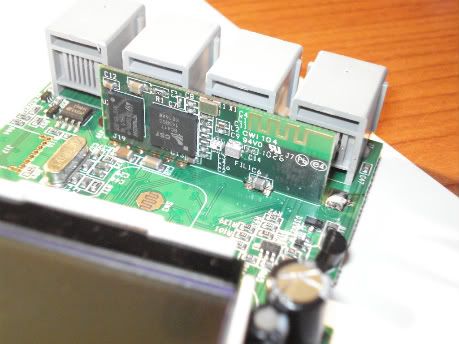
- the Atmel 32-bit ARM main processor (AT91SAM7S256)
- and the tiny ATmega48 co-processor

I had no time to inspect all of the components, because I had to replace the broken port. Unsoldering the old port was exhausting.

Placing the new one was easy and it cаme up pretty well.

It was time to put everything together. I don't know why but resoldering the right pin of the battery took me ages. When you put it together do not forget to place the black rubber button between the board and battery holder - you need it if you have rechargable li-ion battery. Before screwing back the last four bolts check if you have connection with your PC.
For full information and schematics download this
Labels:
NXT
Subscribe to:
Comments (Atom)
